
Vitavia Athena 7000 Handleiding
PDF handleiding · 56 Pagina's
Nederlands



Snelle check
Onjuist antwoord, probeer opnieuw.
Chat met je Vitavia Athena 7000-handleiding via AI
Krijg direct AI-antwoorden uit je Vitavia Athena 7000-handleiding
Vraag alles over Vitavia Athena 7000. Antwoorden komen uit deze handleiding, met de pagina's waarop ze zijn gebaseerd.
Athena 7000 Onderhoudsschema
Was de kas af en toe grondig met een mild reinigingsmiddel. Zorg ervoor dat het reinigingsmiddel niet agressief reageert met aluminium of kunststof.
Zorg ervoor dat de deur rails regelmatig worden gereinigd om ophoping van vuil te voorkomen.
Controleer 2 weken na voltooiing van de montage de aandraaiing van alle moeren en bouten.
Stel eenVraag
Beveel je Athena 7000 aan?
Ja NeeVeelgestelde Vragen
U hebt schroevendraaiers, een rubberen hamer, ladders, sleutels, een ambachtmes, een meetstok, een waterpas en een accuboormachine met instelbaar koppel nodig.
Is dit antwoord nuttig?
Ja, de Vitavia Athena ondersteunt meerdere beglazingssoorten waaronder 4mm glas, 10mm polycarbonaat en 16mm polycarbonaat afhankelijk van de modelconfiguratie.
Is dit antwoord nuttig?
Nee, de fundering is niet inbegrepen. U moet zelf een solide basis construeren van beton, metselwerk of stenenwerk voordat de montage begint.
Is dit antwoord nuttig?
Condensatie kan worden verminderd door specifieke onderdelen zoals (7424/7425) te vervangen door (7423*) om de interne ventilatie te vergroten, vooral bij polycarbonaatmodellen.
Is dit antwoord nuttig?
Ja, het verankeren van de serre is verplicht voor veiligheid en stabiliteit, vooral tegen windbelastingen en om te voldoen aan verzekeringsvereisten.
Is dit antwoord nuttig?
Voordelen en Nadelen
Voordelen

- Duurzame aluminium frameconstructie zorgt voor langdurige prestaties
- Veelzijdige beglazingsopties ondersteunen zowel glas als polycarbonaatpanelen
- Schuifdeurontwerp zorgt voor handige in- en uitgang
- Dakraampjes bieden uitstekende natuurlijke ventilatie en temperatuurcontrole
- Gedetailleerde montagerichtlijnen vereenvoudigen het bouwproces
Nadelen

- Vereist een perfect waterpas en vierkante fundering voor juiste installatie
- Montage vereist doorgaans twee personen voor veiligheid en efficiëntie
- Neutraal silicone voor afdichting is niet inbegrepen in het pakket
- Condensatie kan optreden bij polycarbonaat zonder specifieke ventilatieaanpassingen
- Funderingsmaterialen worden niet verstrekt en moeten apart worden verkregen
Product Specificatie
Beglazing
Poliethyleen 10mm (holle kamerpanelen), veiligheids glas 3mm (eenlaags)
Frame
Aluminium
Kleur
Zilver
Oppervlakte
6,89 m2
Kenmerken
1 dakraam, regenpijp, afsluitbaar
Deur
Dubbel schuifdeur
Afmetingen (LxBxH)
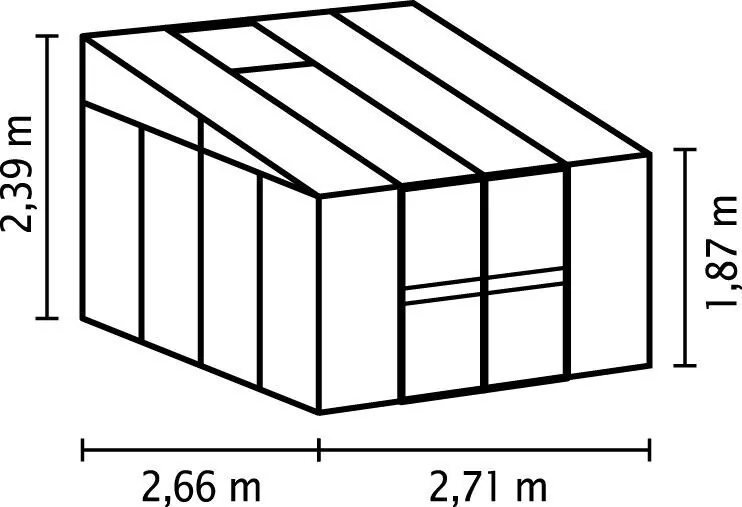
2,66x2,73x2,39 m
Product Beschrijving
Vitavia Athena 7000 ESG/HKP serre van aluminium Handleiding
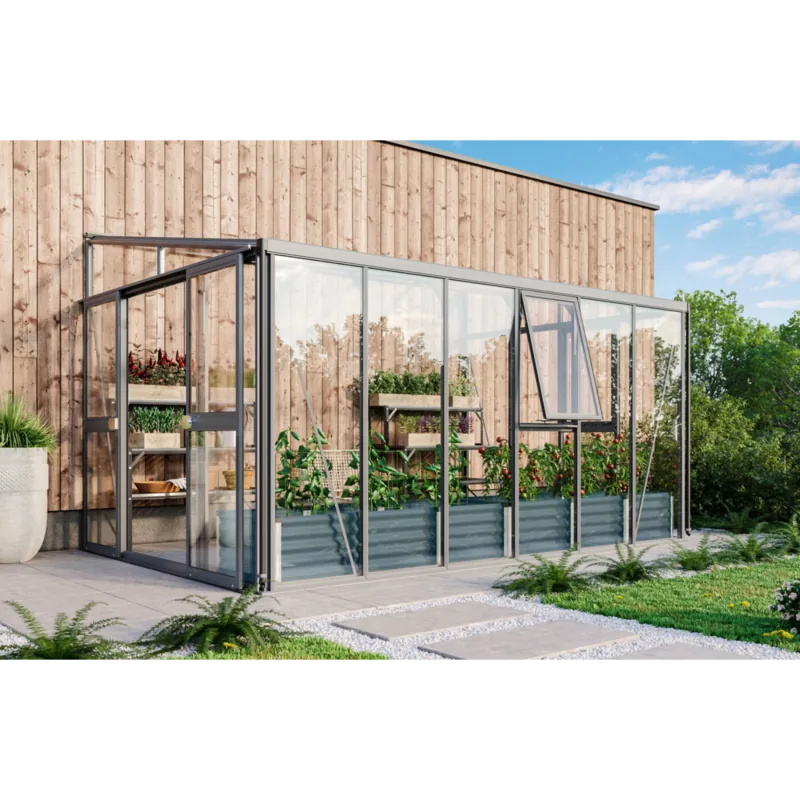
De Vitavia Athena 7000 is een robuuste en elegante serre die is ontworpen voor serieuze tuinders die duurzaamheid en stijl eisen. Gebouwd uit hoogwaardig aluminium, biedt deze constructie uitzonderlijke sterkte terwijl het een strakke, moderne esthetiek behoudt die elke tuin aanvult. De handleiding dient als uw uitgebreide gids om het volledige potentieel van dit product te ontsluiten, zodat u er met vertrouwen en precisie mee kunt monteren.
De montage begint met zorgvuldige locatiekeuze. Het is cruciaal om een locatie te kiezen die veel zonlicht ontvangt en beschut is tegen sterke winden. Een solide fundering van beton, baksteen of steen wordt aanbevolen om stabiliteit en levensduur te garanderen. De fundering moet perfect waterpas en vierkant zijn voordat u begint met het plaatsen van de framecomponenten. Veiligheid staat tijdens het bouwproces voorop; draag altijd beschermende uitrusting zoals handschoenen en brillen bij het hanteren van aluminium profielen, glas of polycarbonaatplaten.
De Vitavia Athena beschikt over een schuifdeursysteem dat gemakkelijke toegang tot uw planten biedt. Het frame wordt sectie per sectie gemonteerd, beginnend met de voorste elementen en geveluiteinden. De instructies details hoe zij-elementen te verbinden, dakmiddenbalken te installeren en dakraampjes te passen voor optimale klimaatregeling. Of u nu kiest om de eenheid te beglazen met 4mm glas of verschillende diktes polycarbonaat, het flexibele ontwerp past beide materialen naadloos aan. Goed afdichten met neutraal silicone wordt geadviseerd om ervoor te zorgen dat de serre weerbestendig blijft.
Onderhoud is eenvoudig maar essentieel om uw serre in topconditie te houden. Regelmatig reinigen van de rails en frames voorkomt vuilophoping, wat de soepele werking van deuren en ramen zou kunnen belemmeren. Controleer periodiek alle moeren en bouten na twee weken gebruik om ervoor te zorgen dat ze strak blijven. Door deze richtlijnen te volgen in de Vitavia Athena 7000 ESG/HKP serre van aluminium Handleiding, creëert u een bloeiende omgeving voor uw planten voor jarenlang.
Zoek naar 67.706 Handleidingen online


Typ merk of model in