
Manual.ly Logo

Vitavia Athena 7000 Handleiding

0,0 · 0 Beoordelingen

PDF handleiding · 56 Pagina's

Nederlands

M: QW-35-FL
pagina

/ 56

Loading...
9de2b5480c9cdf600cc14f62897b00bb6a2c page 6
6
1. PLEASE READ THESE INSTRUCTIONS CAREFULLY AND COMPLETELY BEFORE ASSEMBLING YOUR GREENHOUSE.
2. Sharp edges and corners can cause injury. Always wear protective glasses, gloves, shoes and headgear when handling the aluminium proles, glass
and polycarbonate sheets. Broken glass is a safety hazard – always clear up immediately and dispose of with care.
3. The product you have purchased is intended only for the growing of plants and should only be used for this purpose. When used for other purposes we
will take no responsibility.
4. It is recommended that this greenhouse is assembled by two people.
5. When using a step ladder one person should steady it at all times whilst the other works.
6. Should you encounter difculties constructing this house or in positioning the polycarbonate sheets, please contact your retailer
– do not use force!
7. The green house must always be anchored.
Assembly Instructions
Safety Warning
EN
036.01.1409
SITE SELECTION
Always try to select a sunny location, sheltered
from the wind as much as possible.
IMPORTANT
Before assembling your new greenhouse,
please check that all parts in the provided list
are included. Please take each bundle out of
the packaging in order to identify the parts
better.
It is important that the opened bundles do not
get mixed with one another.
If something is missing please contact your
retailer.
Note - The UV-resistant side of the polycar-
bonate panes is indicated by a plastic folio
or printing at the edge. This side must face
outside.
In order to seal the greenhouse effectively it is
suggested that you apply neutral silicone as
shown in diagrams (4b.3), (4b.4), (7a.7) and
(7a.9). Silicone is provided for this purpose.
NECESSARY TOOLS
Screw drivers (Normal and Crosshead PH2)
Rubber Hammer
2 x 1.8m ladder
10 mm socket spanner or wrench
10 mm combination spanner
Craft knife
Measuring stick
Spirit level
Accu-drill with adjustable torque
MAINTENANCE
The greenhouse should be thoroughly washed
with a gentle detergent occasionally. Please
check that the detergent used does not react
aggressively with aluminium or plastic.
Ensure that the door tracks are cleaned regu-
larly to avoid a buildup of debris.
0. FOUNDATION
Important! The foundation must be exactly
right angular and level. To achieve this you will
require a spirit level and a right angle.
Note - If the distance between the two opposi-
te corners is the same then the foundation is
right angular.
For the erection of this greenhouse we
suggest a solid foundation constructed from
concrete, brickwork or stonework.
If you have no experience with the construc-
tion of such a foundation please consult a
company specialising in this work.
Materials and tools for the preparation of the
suggested foundation are not provided.
The suggested foundation allows the door to
be assembled on any side of the greenhouse.
Foundations must extend down below the frost
level.
Diagrams in a single frame show the view
from inside the greenhouse. Those enclo-
sed in a double frame show the view from
outside the greenhouse.
1. FRONT ELEMENTS
Note - If the door will be assembled in the
front of the house remove one of the middle
bars (7311).
Push seal (7396) into the sill bar (7304 - 7307)
and cut to t both ends (1.1) (1.2).
Lay all of the parts, according to the model, on
the oor and loosely connect by inserting bolts
(7052) into the bolt channels.
Take care that the eave angles (7314 - 7317)
are pushed into the corner of both corner bars
(7310) (1.3) (1.4) and that corner bars (7310)
and middle bars (7311) sit correctly on the
assembly edge on the eave angle (1.9) (1.12).
Assemble diagonal bars (7312) on both sides
(1.3) (1.4) (1.10) (1.11). At the sill loosely at-
tach using bolt (7050). (7050) will be removed
during glazing (section 7b).
2. PLAIN GABLE END
Note - If the door will be assembled on this
side of the house remove middle bar (7311).
Push seal (7396) into sill bar (7301) and wall
bar (7344) and cut to t the ends (2.1) - (2.4).
Lay all of the parts on the oor and loosely
connect by inserting bolts (7052) into the bolt
channels.
Assemble end bar (7321) into the recess in
wall bar (7344) (2.5) (2.6) and then (7344)
onto sill bar (7301) (2.7) (2.8).
Assemble middle bars (7311) (2.9) (2.10),
noting the assembly edge on the eave angle
(1.9).
Assemble diagonal bar (7313) (2.5) (2.11)
(2.12). At the sill loosely attach using bolt
(7050). (7050) will be removed during glazing
(section 7b).
3. DOOR GABLE END
Note - If the door is to be assembled on ano-
ther side then assemble the (7311), which
was previously removed, in position b.
Assemble all parts as in Section 2.
4a. CONNECTING THE SIDE ELEMENTS
(4a.1) shows the 4a assembly if the door is to
be in the front of the house.
Push seal (7396) into the ridge bar (7334 -
7337) and cut to t the ends. Check that seal
(7414 - 7417) is correctly inserted into the
guide in the ridge bar. (4a.2) (4a.3).
Loosely prepare bolts (7052) and nuts (7053)

Chat met je Vitavia Athena 7000-handleiding via AI

Krijg direct AI-antwoorden uit je Vitavia Athena 7000-handleiding

Vraag alles over Vitavia Athena 7000. Antwoorden komen uit deze handleiding, met de pagina's waarop ze zijn gebaseerd.

Athena 7000 Onderhoudsschema

Gelegentlich
Was de kas met een mild reinigingsmiddel

Was de kas af en toe grondig met een mild reinigingsmiddel. Zorg ervoor dat het reinigingsmiddel niet agressief reageert met aluminium of kunststof.

Regelmatig
Reinig de deur rails

Zorg ervoor dat de deur rails regelmatig worden gereinigd om ophoping van vuil te voorkomen.

Na montage
Controleer de aandraaiing van moeren en bouten

Controleer 2 weken na voltooiing van de montage de aandraaiing van alle moeren en bouten.

M: qwen/qwen3.8-flash

Stel eenVraag

0/1000

Beveel je Athena 7000 aan?

Ja Nee

Veelgestelde Vragen

A

U hebt schroevendraaiers, een rubberen hamer, ladders, sleutels, een ambachtmes, een meetstok, een waterpas en een accuboormachine met instelbaar koppel nodig.

Is dit antwoord nuttig?

A

Ja, de Vitavia Athena ondersteunt meerdere beglazingssoorten waaronder 4mm glas, 10mm polycarbonaat en 16mm polycarbonaat afhankelijk van de modelconfiguratie.

Is dit antwoord nuttig?

A

Nee, de fundering is niet inbegrepen. U moet zelf een solide basis construeren van beton, metselwerk of stenenwerk voordat de montage begint.

Is dit antwoord nuttig?

A

Condensatie kan worden verminderd door specifieke onderdelen zoals (7424/7425) te vervangen door (7423*) om de interne ventilatie te vergroten, vooral bij polycarbonaatmodellen.

Is dit antwoord nuttig?

A

Ja, het verankeren van de serre is verplicht voor veiligheid en stabiliteit, vooral tegen windbelastingen en om te voldoen aan verzekeringsvereisten.

Is dit antwoord nuttig?

M: QW-35-FL

Voordelen en Nadelen

Voordelen

  • Duurzame aluminium frameconstructie zorgt voor langdurige prestaties
  • Veelzijdige beglazingsopties ondersteunen zowel glas als polycarbonaatpanelen
  • Schuifdeurontwerp zorgt voor handige in- en uitgang
  • Dakraampjes bieden uitstekende natuurlijke ventilatie en temperatuurcontrole
  • Gedetailleerde montagerichtlijnen vereenvoudigen het bouwproces
VS

Nadelen

  • Vereist een perfect waterpas en vierkante fundering voor juiste installatie
  • Montage vereist doorgaans twee personen voor veiligheid en efficiëntie
  • Neutraal silicone voor afdichting is niet inbegrepen in het pakket
  • Condensatie kan optreden bij polycarbonaat zonder specifieke ventilatieaanpassingen
  • Funderingsmaterialen worden niet verstrekt en moeten apart worden verkregen
M: QW-35-FL

Product Specificatie

Beglazing

Poliethyleen 10mm (holle kamerpanelen), veiligheids glas 3mm (eenlaags)

Frame

Aluminium

Kleur

Zilver

Oppervlakte

6,89 m2

Kenmerken

1 dakraam, regenpijp, afsluitbaar

Deur

Dubbel schuifdeur

Afmetingen (LxBxH)

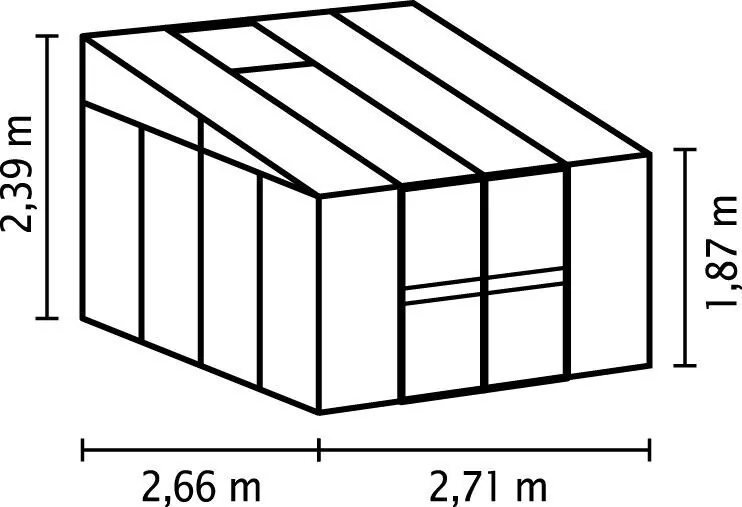
2,66x2,73x2,39 m

M: QW-35-FL

Product Beschrijving

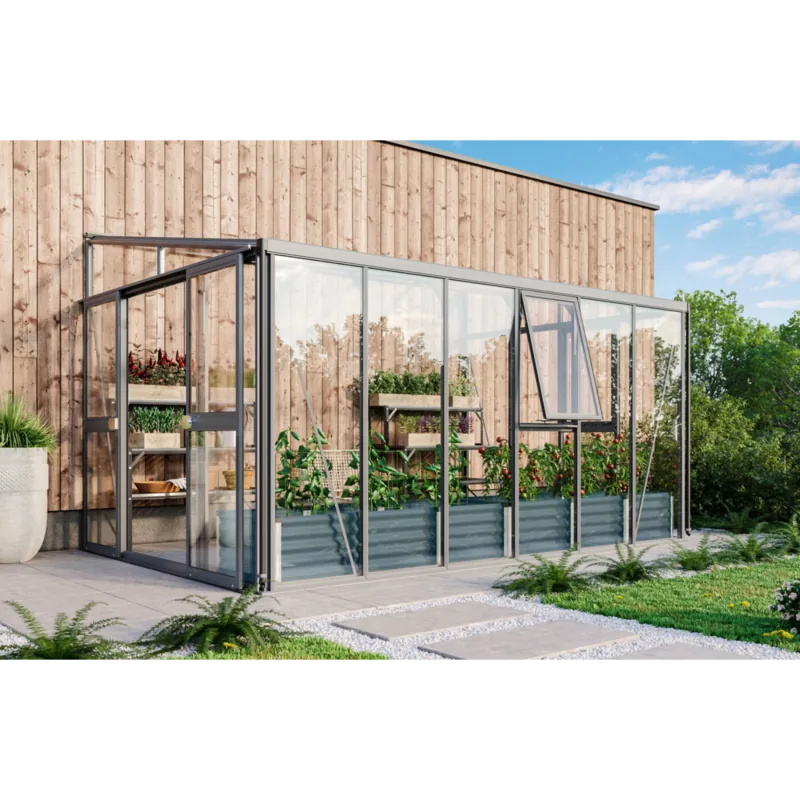
Vitavia Athena 7000 ESG/HKP serre van aluminium Handleiding

De Vitavia Athena 7000 is een robuuste en elegante serre die is ontworpen voor serieuze tuinders die duurzaamheid en stijl eisen. Gebouwd uit hoogwaardig aluminium, biedt deze constructie uitzonderlijke sterkte terwijl het een strakke, moderne esthetiek behoudt die elke tuin aanvult. De handleiding dient als uw uitgebreide gids om het volledige potentieel van dit product te ontsluiten, zodat u er met vertrouwen en precisie mee kunt monteren.

De montage begint met zorgvuldige locatiekeuze. Het is cruciaal om een locatie te kiezen die veel zonlicht ontvangt en beschut is tegen sterke winden. Een solide fundering van beton, baksteen of steen wordt aanbevolen om stabiliteit en levensduur te garanderen. De fundering moet perfect waterpas en vierkant zijn voordat u begint met het plaatsen van de framecomponenten. Veiligheid staat tijdens het bouwproces voorop; draag altijd beschermende uitrusting zoals handschoenen en brillen bij het hanteren van aluminium profielen, glas of polycarbonaatplaten.

De Vitavia Athena beschikt over een schuifdeursysteem dat gemakkelijke toegang tot uw planten biedt. Het frame wordt sectie per sectie gemonteerd, beginnend met de voorste elementen en geveluiteinden. De instructies details hoe zij-elementen te verbinden, dakmiddenbalken te installeren en dakraampjes te passen voor optimale klimaatregeling. Of u nu kiest om de eenheid te beglazen met 4mm glas of verschillende diktes polycarbonaat, het flexibele ontwerp past beide materialen naadloos aan. Goed afdichten met neutraal silicone wordt geadviseerd om ervoor te zorgen dat de serre weerbestendig blijft.

Onderhoud is eenvoudig maar essentieel om uw serre in topconditie te houden. Regelmatig reinigen van de rails en frames voorkomt vuilophoping, wat de soepele werking van deuren en ramen zou kunnen belemmeren. Controleer periodiek alle moeren en bouten na twee weken gebruik om ervoor te zorgen dat ze strak blijven. Door deze richtlijnen te volgen in de Vitavia Athena 7000 ESG/HKP serre van aluminium Handleiding, creëert u een bloeiende omgeving voor uw planten voor jarenlang.

M: QW-35-FL

© Copyright 2026 Manual.ly