
Manual.ly Logo

Vitavia Mars 6700 Handleiding

0,0 · 0 Beoordelingen

PDF handleiding · 32 Pagina's

Nederlands

M: GO-GEM-FL-25
pagina

/ 32

Loading...
b8d879b37ab1677515d6cd836439a4c97240 page 4
4
SITE SELECTION
Always try to select a sunny location, sheltered
from the wind as much as possible.
IMPORTANT
Before assembling your new greenhouse,
please check that all parts in the provided list
are included. Please take each bundle out of
the packaging in order to identify the parts
better.
It is important that the opened bundles do not
get mixed with one another.
If something is missing please contact your
retailer.
Nuts (1002) - Max. tightening torque 3Nm.
NECESSARY TOOLS
Screw drivers (Normal and Crosshead PH2),
10 mm socket spanner or wrench, 10 mm
combination spanner, knife, measuring stick,
spirit level, Accu-drill with adjustable torque.
MAINTENANCE
The greenhouse should be thoroughly washed
with a gentle detergent occasionally. Please
check that the detergent used does not react
aggressively with aluminium or the glass xing
clips.
Ensure that the upper and lower door tracks
are cleaned regularly to avoid a build up of
debris.
0. BASE
Important! The base must be exactly square
and level. A zinc-coated steel base is available
as an accessory for all greenhouse models.
(Attention! Only when the greenhouse has to
be located in a very windy and unprotected
location: Drill through both the prole at the
base of the greenhouse and the steel base,
and connect them with nuts and bolts.)
If you would rather construct your own stone
or concrete foundation, please follow the
dimensions specied in diagram 0. Treated
wooden beams at least 18 mm high and not
more then 32 mm wide should be positioned
between the stone/concrete foundation and
the aluminium frame, and connected to the
foundation with 50 mm long bolts (not pro-
vided).
Foundations must extend down below the frost
level.
Diagrams in a single frame show the view
from inside the greenhouse. Those enclo-
sed in a double frame show the view from
outside the greenhouse.
1. SIDE ELEMENTS
Lay all of the parts on the oor and connect
them loosely.
At this stage it is necessary with each vertical
aluminium bar (3032) to include an extra
connecting bolt, to later connect corner braces
(2056) (1.5). On the outside bars (3032) in-
clude one additional extra bolt, to also connect
cross braces (3095) (1.2).
Loosely connect the corner plate (1092) (1.1).
In step 4 the corner plate bolts must also be
connected to the gable ends.
2. PLAIN GABLE END
Lay all of the parts on the oor and connect
them loosely.
Include two extra connecting bolts in the
vertical bars (3041 and 3042) to connect the
cross braces (2.2) and (2.6). In the vertical bar
(3101) please include only one extra bolt.
3. DOOR GABLE END
Lay all of the parts on the oor and connect
them loosely.
The door runner bars (1347) will be connected
to the horizontal bar (2048). Connect these
loosely from the outside with three nuts and
bolts.
Connect (5001) and (5002) as shown in (3.10)
(3.11) with a nut and bolt.
As in step 2, please include two extra bolts in
both vertical bars (3041) and (3042) (3.3).
4A. CONNECTING THE SEPARATE
ELEMENTS
Bolt the side elements to the end elements.
(4.1) & (4.2).
Loosely connect the corner plate (1092) above
the eaves (4.3).
Assemble the ridge bar and then the corner
plates (1092) on the gable ends (4.4/4.5).
Connect the door runner supports (2043) to
the door runner bars (1347) using washer
(6060) (4.1) and to the gable end using bolt
(1005) and spacer (1310) (4.3) (4.6).
4B. CONNECTING THE SEPARATE
ELEMENTS
Connect the roof glazing bars (2055) between
the eaves (4.7) and the ridge bar (4.8). Insert
extra bolts into each glazing bar depending on
which house you have bought. The number is
indicated in a circle on each bar and to be
read beginning from both ends.
The corner braces (2056) (4.7), the roof
braces (3057) (4.9) and the cross braces
(2033) (4.11) (4.12) (4.13) can now be con-
nected.
Now position your greenhouse on the pre-
pared base/foundation and connect loosely.
Please do not over tighten. (max. 3Nm)
Adjust the greenhouse until it is completely
square and tighten all bolts.
Please do not over tighten.
Press the end protectors (1017) and (1018)
onto the prole ends (4.10).
Assembly Instructions
Safety Warning
EN
1. PLEASE READ THESE INSTRUCTIONS CAREFULLY AND COMPLETELY BEFORE ASSEMBLING YOUR GREENHOUSE.
2. Sharp edges and corners can cause injury. Always wear protective glasses, gloves, shoes and headgear when handling the aluminium proles, glass and
polycarbonate sheets. Broken glass is a safety hazard – always clear up immediately and dispose of with care.
3.
The product you have purchased is intended only for the growing of plants and should only be used for this purpose. When used for other purposes we will
take no responsibility.
4. It is recommended that this greenhouse is assembled by two people.
5. Should you encounter difculties constructing this house, or in tting the glass or polycarbonate sheets, please contact your retailer
– do not use force!
6. The greenhouse must always be anchored.
012.01.1602

Chat met je Vitavia Mars 6700-handleiding via AI

Krijg direct AI-antwoorden uit je Vitavia Mars 6700-handleiding

Vraag alles over Vitavia Mars 6700. Antwoorden komen uit deze handleiding, met de pagina's waarop ze zijn gebaseerd.

Mars 6700 Onderhoudsschema

Af en toe
Was de kas

Was grondig met een milde reiniger. Zorg ervoor dat de reiniger niet agressief reageert met aluminium of glasbevestigingsclips.

Regelmatig
Reinigen deursporen

Reinig regelmatig de bovenste en onderste deursporen om ophoping van vuil te voorkomen.

M: QW-35-FL

Stel eenVraag

0/1000

Beveel je Mars 6700 aan?

Ja Nee

Veelgestelde Vragen

A

Hij combineert een aluminium frame, 4 mm beglazing, een dakraam en een schuifdeur, waardoor een praktische ruimte ontstaat voor het kweken van planten terwijl het onderhoud relatief eenvoudig blijft.

Is dit antwoord nuttig?

A

Ja. Een vierkante en vlakke fundering is belangrijk voor de stabiliteit. De instructies benadrukken dat de kas goed verankerd moet worden, vooral op winderige locaties.

Is dit antwoord nuttig?

A

Het wordt sterk aanbevolen dat twee personen de montage uitvoeren. De onderdelen zijn groot genoeg en het beglazingsproces is eenvoudiger en veiliger met hulp.

Is dit antwoord nuttig?

A

Af en toe wassen met een mild schoonmaakmiddel, regelmatig de deurrails reinigen en de afdichtingen en clips controleren zijn de belangrijkste onderhoudstaken.

Is dit antwoord nuttig?

A

Ja, als hij correct is verankerd en op een goede basis is geplaatst. In zeer open gebieden wordt extra bevestiging op een stalen basis aanbevolen.

Is dit antwoord nuttig?

A

Sluit alle deuren en ventilatieopeningen bij harde wind. Bij zware sneeuw moet het dak worden sneeuwvrij gemaakt, zodat de belasting niet te zwaar wordt voor de constructie.

Is dit antwoord nuttig?

M: GO-GEM-FL-25

Voordelen en Nadelen

Voordelen

  • Licht aluminium frame biedt solide duurzaamheid met weinig onderhoud.
  • 4 mm beglazing ondersteunt goede lichtinval voor gezonde plantengroei.
  • Dakraam en schuifdeur verbeteren de ventilatie en dagelijkse toegang.
  • Gedetailleerd montagesysteem helpt een stabiele, vierkante kas te creëren wanneer correct geïnstalleerd.
VS

Nadelen

  • Montage kost tijd en vereist zorgvuldig stap-voor-stap werken.
  • Twee personen worden aanbevolen voor de installatie, wat het minder handig kan maken.
  • Een vlakke, vierkante fundering is essentieel, dus voorbereiding van de locatie is belangrijk.
  • Het hanteren van glas en het vastdraaien tot de limiet vereist voorzichtigheid om schade te voorkomen.
M: GO-GEM-FL-25

Product Specificatie

Beglazing

Polycarbonaat 4 mm (dubbelwandige platen)

Frame

Aluminium

Kleur

zilver

Oppervlakte

6,7 m²

Bijzondere kenmerken

2 dakramen

Deur

Dubbele schuifdeur, Regengoot

Afmetingen (LxBxH)

2580 x 2570 x 2320 mm

Gewicht

54,80 kg

M: GO-GEM-FL-25

Product Beschrijving

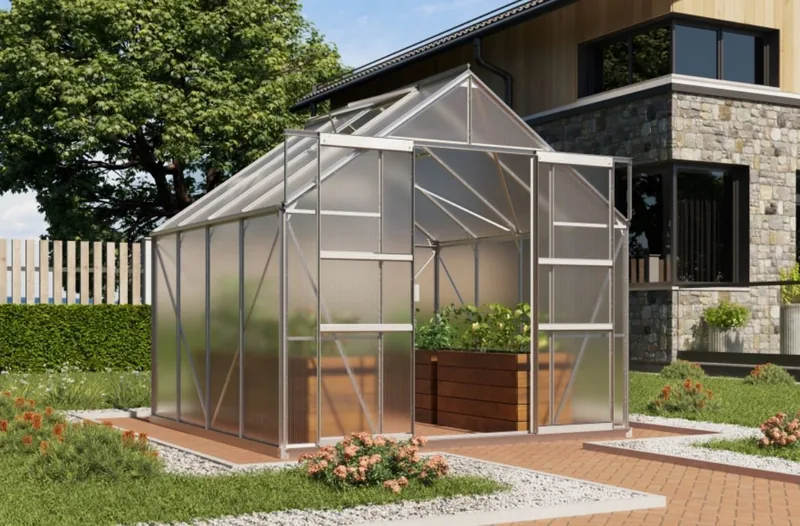
Vitavia Mars 6700 HKP 4mm Kas Aluminium

De Vitavia Mars 6700 HKP 4mm kas aluminium is een praktische keuze voor tuiniers die een betrouwbare kweekruimte willen met een heldere, lichte constructie. Gebouwd rond een aluminium frame en ontworpen voor 4 mm beglazing, biedt deze kas een goede balans tussen duurzaamheid en een verfijnde uitstraling die zowel in compacte als grotere tuinen past.

Een van de sterkste punten van deze kas is de doordachte constructie. Het frame is bedoeld om verankerd te worden op een vlakke fundering, wat helpt om de constructie stabiel te houden bij wisselende weersomstandigheden. Het ontwerp bevat ook een schuifdeur en een dakraam, waardoor je de luchtstroom beter kunt regelen en de kas makkelijker dagelijks kunt betreden. Voor plantenliefhebbers betekent dat een comfortabelere omgeving voor zaailingen, kruiden, tomaten en seizoensgewassen.

De handleiding benadrukt het belang van zorgvuldige montage, en dat zegt veel over het product zelf: dit is een kas die is gebouwd voor langdurig gebruik, niet voor een snelle tijdelijke opstelling. De aluminium profielen, glaslatten, verstevigingen en deuronderdelen werken samen om een solide kweekruimte te creëren wanneer alles correct wordt gemonteerd. De specificatie van 4 mm beglazing maakt het een veelzijdige optie voor tuiniers die bescherming, lichtdoorlatendheid en een nette afwerking willen.

Het is ook een kas die voorbereiding beloont. Een vierkante basis, het juiste gereedschap en twee personen voor de montage worden allemaal aanbevolen, wat de installatie soepeler en het eindresultaat betrouwbaarder maakt. Eenmaal geïnstalleerd is het onderhoud eenvoudig: af en toe wassen, de deurrails schoonhouden en aandacht besteden aan afdichtingen en clips helpen om de kas seizoen na seizoen goed te laten functioneren.

Opmerkingen

  • Plaats bij voorkeur op een zonnige, beschutte plek.
  • Moet worden verankerd en waterpas worden gehouden.
  • Sluit deuren en ventilatieopeningen bij harde wind.
  • Verwijder sneeuw van het dak in de winter.
  • Bewaar het modelplaatje en de handleiding voor toekomstig gebruik.
M: GO-GEM-FL-25

© Copyright 2026 Manual.ly