
Vitavia Ida 900 Handleiding
PDF handleiding · 48 Pagina's
Nederlands



Snelle check
Onjuist antwoord, probeer opnieuw.
Chat met je Vitavia Ida 900-handleiding via AI
Krijg direct AI-antwoorden uit je Vitavia Ida 900-handleiding
Vraag alles over Vitavia Ida 900. Antwoorden komen uit deze handleiding, met de pagina's waarop ze zijn gebaseerd.
Ida 900 Onderhoudsschema
Was de kas af en toe grondig met een zacht wasmiddel. Zorg ervoor dat het wasmiddel niet agressief reageert met aluminium- of glasklemmen.
Reinig regelmatig de bovenste en onderste deursporen om ophoping van vuil te voorkomen.
Stel eenVraag
Beveel je Ida 900 aan?
Ja NeeVeelgestelde Vragen
De aanbouwopstelling bespaart ruimte en gebruikt een bestaande muur als steun. Het helpt de kas ook beschutter aan te voelen, wat nuttig kan zijn in winderige tuinen of kleinere buitenruimtes.
Is dit antwoord nuttig?
Ja, maar alleen als hij goed verankerd is en op een stabiele fundering staat. De instructies benadrukken stevige bevestiging, vooral op blootgestelde of winderige plekken, om de constructie veilig te houden.
Is dit antwoord nuttig?
Ja. Er is een dakraam aanwezig, waarmee warmte kan ontsnappen en de luchtstroom verbetert. Dat maakt het makkelijker om temperatuur en luchtvochtigheid te regelen tijdens warmere periodes.
Is dit antwoord nuttig?
Ja, de deur kan in elk voorste gedeelte worden geplaatst. Dat geeft enige flexibiliteit tijdens de montage en laat je de indeling aanpassen aan je tuinopstelling.
Is dit antwoord nuttig?
De tekst verwijst naar helder glas en vermeldt ook dat polycarbonaatplaten gebruikt kunnen worden in plaats daarvan. De exacte beglazingsmethode hangt af van het gekozen materiaal en de dikte.
Is dit antwoord nuttig?
Controleer of alle onderdelen aanwezig zijn, bereid het juiste gereedschap voor en zorg dat de fundering vlak en vierkant is. Beschermende uitrusting wordt ook aanbevolen bij het hanteren van glas- of metalen onderdelen.
Is dit antwoord nuttig?
Maak hem af en toe schoon met een mild schoonmaakmiddel, vermijd agressieve chemicaliën op aluminium of klemmen, en houd de deurrails regelmatig vrij van vuil. Let in de winter op sneeuwbelasting en houd ventilatieopeningen gesloten bij harde wind.
Is dit antwoord nuttig?
Voordelen en Nadelen
Voordelen

- Ruimtebesparend aanbouwontwerp gebruikt een muur als steun en past goed in kleinere tuinen.
- Aluminium frame is duurzaam en onderhoudsarm voor buitengebruik.
- 4 mm beglazing helpt een lichte kweekruimte voor planten te creëren.
- Dakraam en schuifdeur verbeteren de luchtstroom en dagelijkse toegang.
Nadelen

- Montage is gedetailleerd en werkt het best met twee personen.
- Een vlakke, vierkante fundering en stevige verankering zijn vereist.
- Het hanteren van glas brengt veiligheidsrisico's met zich mee en vereist beschermende uitrusting.
- Sommige gereedschappen en bevestigingsmaterialen zijn niet inbegrepen in de verpakking.
Product Specificatie
Beglazing
Polycarbonaat 4mm (Dubbelwandige platen)
Frame
Aluminium
Kleur
zilver
Oppervlakte
0,9m²
Bijzonderheden
Dakraam
Deur
Schuifdeur
Afmetingen (LxBxH)
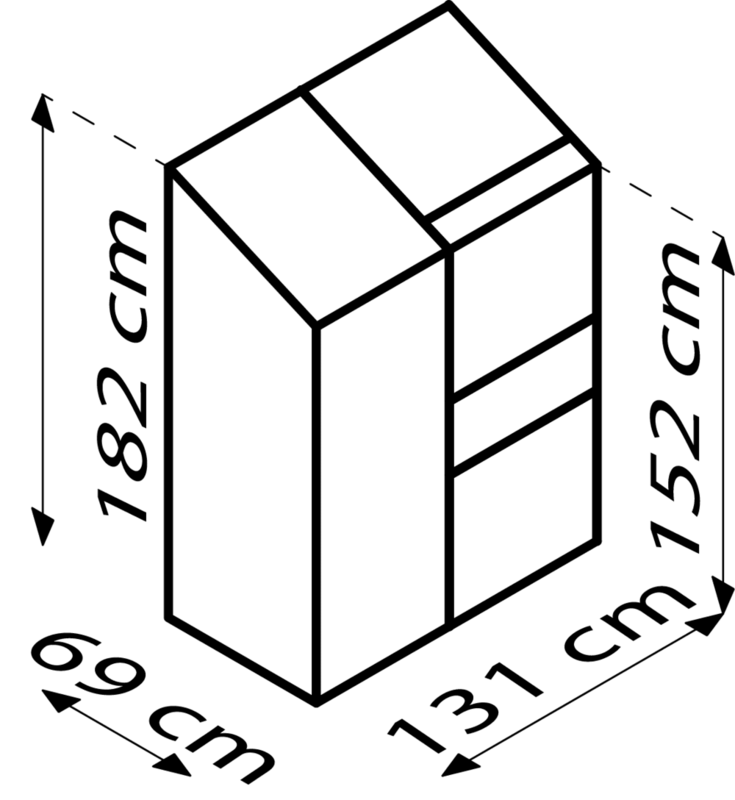
1310x690x1820mm
Product Beschrijving
Vitavia Ida 900 HKP 4mm Aanbouwkas Aluminium
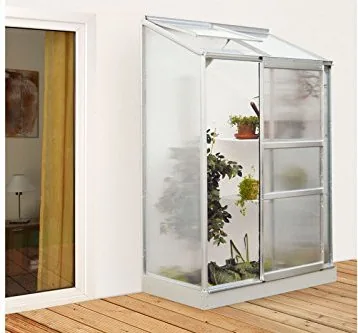
De Vitavia Ida 900 HKP 4mm aanbouwkas aluminium handleiding wijst op een compacte, aan de muur bevestigde kas die is ontworpen voor tuiniers die een praktische kweekruimte willen zonder de hele tuin in beslag te nemen. De aanbouwconstructie maakt slim gebruik van een buitenmuur, waardoor de kas beschut blijft en toch veel zonlicht opvangt voor zaailingen, kruiden en seizoensplanten.
Een ruimtebesparende kas voor alledaags tuinieren
Wat dit model aantrekkelijk maakt, is de balans tussen eenvoud en functionaliteit. Het aluminium frame biedt een strakke, duurzame constructie die bestand is tegen buitenomstandigheden, terwijl de 4 mm beglazing zorgt voor een lichte binnenruimte voor plantengroei. Het ontwerp bevat ook een schuifdeur en een dakraam, beide belangrijk voor comfort, ventilatie en dagelijkse toegang. Voor tuiniers die waarde hechten aan een ordelijke opstelling, voelt de kas efficiënt aan in plaats van overdreven groot.
Deze kas is duidelijk gemaakt met stabiliteit in gedachten. De instructies benadrukken een vierkante, vlakke fundering en stevige verankering, wat een sterk teken is dat het product bedoeld is voor serieus gebruik en niet alleen voor decoratieve plaatsing. Eenmaal correct geïnstalleerd kan het een betrouwbare plek worden om planten te kweken tijdens wisselende seizoenen. Het aan de muur bevestigde concept helpt ook een beter beschermd microklimaat te creëren, vooral in open tuinen waar wind een probleem kan zijn.
Gebouwd met praktisch tuinieren in gedachten
De montage-instructies suggereren een zorgvuldige, stapsgewijze aanpak, wat de stevige constructie van het product weerspiegelt. Het laat ook zien dat de kas bedoeld is om met oog voor detail te worden opgebouwd: alle onderdelen controleren, het juiste gereedschap gebruiken en glas of polycarbonaat veilig hanteren. Dat klinkt misschien veeleisend, maar het betekent ook dat het eindresultaat solide en duurzaam is.
Voor tuiniers die graag georganiseerd kweken, biedt deze kas een goede mix van ventilatie, toegang en bescherming tegen weersinvloeden. Het dakraam helpt warmte af te voeren op zonnige dagen, terwijl de schuifdeur het binnenkomen gemakkelijk maakt. Kortom, het is een compacte oplossing voor iedereen die het seizoen wil verlengen en planten een beter gecontroleerde omgeving wil geven.
Opmerkingen
- Installeer op een vlakke, vierkante basis voor de beste stabiliteit.
- Twee personen worden aanbevolen voor de montage.
- Veranker de kas stevig, vooral in winderige gebieden.
- Houd deurrails en ventilatieonderdelen schoon voor soepeler gebruik.
Samenvatting
De Vitavia Ida 900 HKP 4mm aanbouwkas aluminium is een ruimte-efficiënte kweekconstructie met een duurzaam frame, praktische ventilatie en een ontwerp gericht op zorgvuldige plantenverzorging. Hij past bij tuiniers die een compacte, aan de muur aangepaste kas willen die stevig, nuttig en geschikt voor regelmatig gebruik aanvoelt.
Zoek naar 67.706 Handleidingen online


Typ merk of model in