
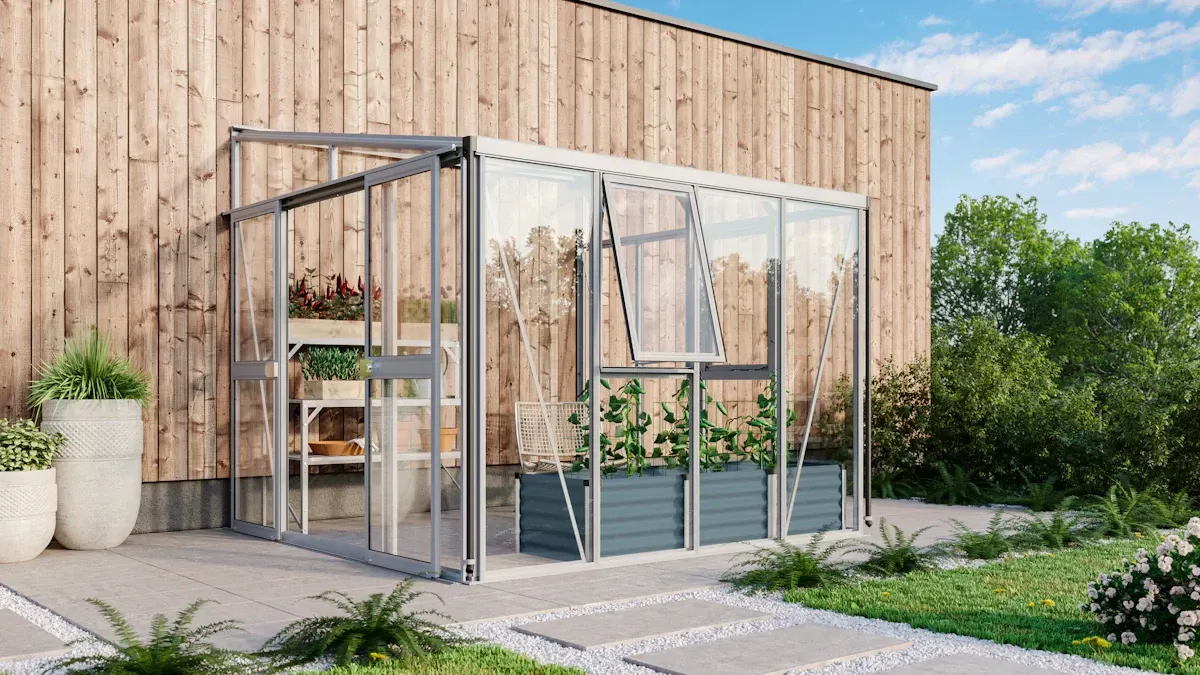
Vitavia Helena 7000 Handleiding
PDF handleiding · 54 Pagina's
Nederlands



Snelle check
Onjuist antwoord, probeer opnieuw.
Chat met je Vitavia Helena 7000-handleiding via AI
Krijg direct AI-antwoorden uit je Vitavia Helena 7000-handleiding
Vraag alles over Vitavia Helena 7000. Antwoorden komen uit deze handleiding, met de pagina's waarop ze zijn gebaseerd.
Helena 7000 Onderhoudsschema
Maak deursporen regelmatig schoon om ophoping van vuil te voorkomen.
Was de kas grondig af met een zacht wasmiddel dat niet agressief reageert met aluminium of plastic.
Gratis onderhoudsherinneringen
Afgestemd op uw aankoopdatum. Altijd gratis, op elk moment afmelden.
Stel eenVraag
Beveel je Helena 7000 aan?
Ja NeeVeelgestelde Vragen
Hij is ontworpen voor het kweken van planten in een beschermde kasomgeving. De constructie ondersteunt licht, luchtstroom en temperatuurbeheer voor dagelijks tuinieren.
Is dit antwoord nuttig?
Ja. De indeling is flexibel en de deur kan aan verschillende zijden worden geplaatst, afhankelijk van hoe de fundering en het frame worden gepland.
Is dit antwoord nuttig?
De kas ondersteunt verschillende beglazingsopstellingen, waaronder 4 mm glas/ESG-opties en varianten van polycarbonaat, afhankelijk van de gekozen modelversie.
Is dit antwoord nuttig?
Ja. Een vlakke, haakse, vorstbestendige fundering wordt sterk aanbevolen om de kas stabiel, uitgelijnd en stevig verankerd te houden.
Is dit antwoord nuttig?
Omdat condens normaal is in kasomstandigheden, vooral bij polycarbonaat. Goede ventilatie en de juiste afdichtingskeuzes kunnen dit helpen verminderen.
Is dit antwoord nuttig?
Maak hem af en toe schoon met een mild schoonmaakmiddel, vermijd agressieve chemicaliën op aluminium- of kunststofdelen en verwijder regelmatig vuil uit de deurrails.
Is dit antwoord nuttig?
Voordelen en Nadelen
Voordelen

- Sterk aluminium frame met een strakke, onderhoudsarme afwerking.
- Flexibele indeling met configureerbare deurplaatsing en ventilatie.
- Ondersteunt meerdere beglazingstypen, waaronder 4 mm ESG-glasopties.
- Gedetailleerde montage-instructies helpen een veilige, nauwkeurige opbouw te garanderen.
Nadelen

- Montage is complex en tijdrovend voor mensen zonder ervaring.
- Een correcte haakse fundering is vereist vóór installatie.
- Twee personen worden aanbevolen, dus alleen monteren is niet ideaal.
- Condens kan nog steeds optreden en vereist voortdurende ventilatiebeheersing.
Product Specificatie
Beglazing
Veiligheidsglas 4 mm (enkellaags)
Frame
Aluminium
Kleur
zilver
Oppervlakte
7 m²
Bijzonderheden
1 dakraam
Deur
Dubbele schuifdeur
Afmetingen (LxBxH)
2714 x 2659 x 1873 mm
Gewicht
269,50 kg
Product Beschrijving
Vitavia Helena 7000 ESG 4mm Aluminium Kas Handleiding
De Vitavia Helena 7000 is een praktische kas voor tuiniers die een sterke, aanpasbare kweekruimte willen met een strakke aluminium afwerking. Gebouwd rond een licht maar stevig frame, is hij ontworpen om betrouwbare teelt te ondersteunen terwijl de constructie eenvoudig genoeg blijft om na verloop van tijd te onderhouden. De Vitavia Helena 7000 ESG 4mm aluminium kas Handleiding richt zich op zorgvuldige montage, veilige verankering en correcte beglazing, wat laat zien dat dit model is ontworpen voor langdurig buitengebruik in plaats van een tijdelijke opstelling.
Een van de aantrekkelijkste eigenschappen van deze kas is de flexibiliteit. Het frame kan worden opgebouwd met de deur aan verschillende zijden, en de zijramen bieden waardevolle controle over de ventilatie. Dat is belangrijk voor dagelijks kweken, vooral wanneer de temperatuur stijgt of de luchtvochtigheid binnen toeneemt. Met dakbeglazing, zijbeglazing en de plaatsing van afdichtingen duidelijk behandeld, streeft de Helena 7000 naar een balans tussen bescherming van planten, luchtstroom en licht.
De handleiding weerspiegelt ook een product dat een degelijke voorbereiding verwacht. Een vlakke, haakse fundering is hier niet optioneel; het is onderdeel van de stabiliteit en weersbestendigheid van de kas. Die funderingsvereiste kan extra inspanning vragen, maar helpt de constructie ook uitgelijnd en verankerd te blijven. Voor tuiniers betekent dat betere prestaties bij wind, minder beweging na verloop van tijd en een betrouwbaardere basis voor deuren en panelen.
Een ander pluspunt is de veelzijdigheid van de beglazing. De kas kan worden uitgerust met verschillende paneeldiktes, afhankelijk van de gekozen versie, en de instructies besteden speciale aandacht aan de UV-bestendige zijde van polycarbonaatplaten. Het meegeleverde advies over afdichten, borstelafdichtingen en optionele siliconenafwerking wijst allemaal op een product dat isolatie en een nette pasvorm belangrijk vindt. Tegelijkertijd zijn de opmerkingen over condens eerlijk en nuttig: zelfs een goed gebouwde kas heeft ventilatie en regelmatige aandacht voor vocht nodig.
Praktisch gezien is dit een kas voor tuiniers die van precisie houden. Het is geen snel weekendproject zonder planning, maar het beloont zorgvuldige montage met een nette, functionele en aantrekkelijke kweekomgeving. De aluminium constructie houdt het onderhoud beheersbaar, terwijl de deuren, ramen en dakdelen zijn ontworpen om dagelijks gebruik comfortabeler te maken.
Opmerkingen
- Het beste te installeren met twee personen.
- Een vlakke, vorstbestendige fundering wordt sterk aanbevolen.
- Controleer na montage regelmatig moeren, bouten, rails en afdichtingen.
- Sluit deuren en ventilatieopeningen bij harde wind of sneeuw.
- Neutrale siliconen kunnen de afdichting verbeteren, maar worden niet volledig meegeleverd voor al het randwerk.
Zoek naar 67.706 Handleidingen online


Typ merk of model in