

Vitavia Apollo 5000 Handleiding
PDF handleiding · 24 Pagina's
Nederlands



Snelle check
Onjuist antwoord, probeer opnieuw.
Chat met je Vitavia Apollo 5000-handleiding via AI
Krijg direct AI-antwoorden uit je Vitavia Apollo 5000-handleiding
Vraag alles over Vitavia Apollo 5000. Antwoorden komen uit deze handleiding, met de pagina's waarop ze zijn gebaseerd.
Apollo 5000 Onderhoudsschema
Ongeveer 2 weken na voltooiing, controleer of alle moeren correct zijn aangedraaid.
Reinig af en toe met een milde reiniger. Zorg ervoor dat de reiniger niet agressief reageert met aluminium of glasbevestigingsclips.
Reinig regelmatig de bovenste en onderste deursporen om ophoping van vuil te voorkomen.
Stel eenVraag
Beveel je Apollo 5000 aan?
Ja NeeVeelgestelde Vragen
Deze is het meest geschikt voor het kweken van planten in een beschermde omgeving. Het ontwerp ondersteunt groenten, kruiden, bloemen en zaailingen door licht, beschutting en meer groeicontrole te bieden.
Is dit antwoord nuttig?
Een vlakke fundering houdt het frame haaks, helpt de deur en ventilatieopeningen goed te werken en verbetert de algehele stabiliteit. Het vermindert ook de belasting op de constructie in de loop van de tijd.
Is dit antwoord nuttig?
Ja. Verankering wordt sterk aanbevolen en als noodzakelijk beschreven voor veilig, langdurig gebruik. Het is vooral belangrijk op winderige of open locaties.
Is dit antwoord nuttig?
De kas is voorzien van een dakraam dat helpt overtollige warmte af te voeren en de luchtcirculatie te verbeteren. Dit is handig om oververhitting te voorkomen en gezondere omstandigheden voor de planten te ondersteunen.
Is dit antwoord nuttig?
Af en toe reinigen met een mild schoonmaakmiddel wordt aanbevolen. De deurrails moeten regelmatig worden vrijgemaakt en bevestigingen moeten van tijd tot tijd worden gecontroleerd om alles soepel te laten werken.
Is dit antwoord nuttig?
Het wordt aanbevolen om dit met twee personen te doen. De onderdelen zijn samen makkelijker te hanteren, en een tweede persoon maakt uitlijning, beglazing en verankering veel veiliger en eenvoudiger.
Is dit antwoord nuttig?
Voordelen en Nadelen
Voordelen

- Sterk aluminium frame met een gegalvaniseerde stalen basis voor extra stabiliteit.
- 4 mm beglazing ondersteunt heldere groeiomstandigheden voor een breed scala aan planten.
- Dakraam en schuifdeur verbeteren de luchtcirculatie en de dagelijkse toegang.
- Compact kasontwerp is geschikt voor productief tuinieren in kleine ruimtes.
Nadelen

- Montage kost tijd en vereist zorgvuldige aandacht voor afmetingen en uitlijning.
- Correcte verankering en een vlakke fundering zijn essentieel en vragen extra opbouwinspanning.
- Beglazing en deurrails moeten regelmatig worden schoongemaakt om soepel te blijven werken.
- Kan twee personen en basisgereedschap vereisen voor een veiligere, eenvoudigere installatie.
Product Specificatie
Beglazing
Polycarbonaat 4 mm (Meerwandige platen)
Frame
Aluminium
Kleur
zilver
Oppervlakte
5 m²
Bijzonderheden
1 dakraam
Deur
Schuifdeur
Afmetingen (LxBxH)
2610x1950x1360mm
Gewicht
47,90 kg
Leveringsomvang
Stalen fundering
Product Beschrijving
Vitavia Apollo 5000 HKP 4mm Aluminium Kas
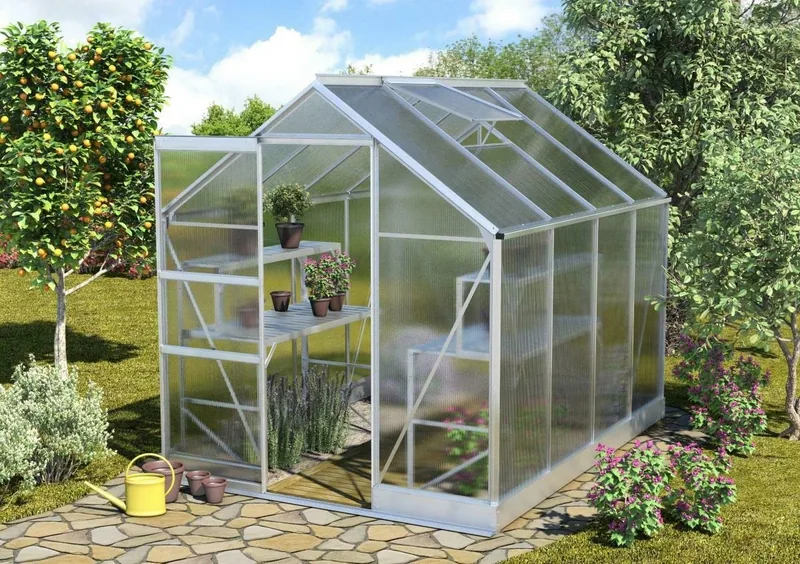
De Vitavia Apollo 5000 HKP 4mm aluminium kas is een praktische keuze voor tuiniers die een stevige kweekruimte willen met een strakke, moderne uitstraling. Gebouwd rond een aluminium frame en ondersteund door een gegalvaniseerde stalen basis, is hij ontworpen om planten een beschermde omgeving te bieden en tegelijk duurzaam te blijven door de seizoenen heen. Als u op zoek bent naar de Vitavia Apollo 5000 HKP 4mm aluminium kas handleiding-ervaring in een eenvoudige, makkelijk te volgen opstelling, weerspiegelt dit model diezelfde focus op structuur, stabiliteit en zorgvuldige montage.
Een van de meest aantrekkelijke aspecten van deze kas is de balans tussen sterkte en lichtdoorlatendheid. De 4 mm beglazing helpt de heldere omstandigheden te creëren die veel planten nodig hebben, terwijl de aluminium constructie het frame licht en corrosiebestendig houdt. Een dakraam verbetert de luchtcirculatie en de schuifdeur maakt dagelijks gebruik gemakkelijk zonder extra ruimte in beslag te nemen. Samen maken deze details de kas geschikt voor het kweken van groenten, kruiden, bloemen en jonge planten in een meer gecontroleerde omgeving.
De Apollo 5000 is ook gebouwd met langdurig gebruik in gedachten. De instructies benadrukken een vlakke, haakse fundering en correcte verankering, wat essentieel is om de kas stabiel te houden op open of winderige locaties. Die aandacht voor de installatie kan tijd kosten, maar helpt de constructie door de jaren heen beter te presteren. Het ontwerp maakt ook regelmatig onderhoud mogelijk, zoals het reinigen van de deurrails, het controleren van bevestigingen en het voorzichtig wassen van de beglazing om de kas soepel te laten werken.
Voor tuiniers die liever een betrouwbare constructie hebben dan een decoratief extraatje, biedt dit model een verstandige mix van functionaliteit en waarde. Het ondersteunt gezonde plantengroei, biedt ruimte voor luchtcirculatie en toegang, en geeft u een compacte maar capabele beschermde ruimte voor seizoensgebonden tuinprojecten.
Opmerkingen
- Plaats de kas altijd op een zonnige, beschutte plek.
- Houd de basis haaks, waterpas en stevig verankerd.
- Maak rails en beglazing regelmatig schoon voor gemakkelijker gebruik en betere prestaties.
- Sluit ventilatieopeningen en deuren bij harde wind of sneeuwval.
Zoek naar 67.706 Handleidingen online


Typ merk of model in